2. Then, in the 2nd layer, I draw the green land with pen tool. The land is next duplicated and reshaped. As shown below:

4. OK, now I have the very general outline of my poster. Then next thing to do will be inserting some text. As for me, I will insert my statement: "CARE FOR NATURE, CARE FROM NATURE." (in another layer) using type tool.


5. After editing the text, including the colors, size and style, I start with the focus point of my poster, that is to copy the tree from assigment 2 and make the "wings".
6. In another smaller window, I trace the wing from my refrences and paste it at my poster in another new layer.

7. Next, I edit the wing and add effects on it (glow and feather). Also, I reduce its opacity to make it more lovely. After that, it is duplicated and reflected for the other part. Then adjust the transpirancy and add in some gradient.

8. Following that will be pasting my "Tree" from assigment 2 into this poster. It is the back up file when I was doing assigment 2...Luckly it is still usable, but it looks a bit difference.

9. After that, I decorate the land with trees and some flower. The small tree is traced from my sketches. I then duplicate it and edit it.

10. Next, I insert text at the bottom part of the poster using type tool.

Below is how I make the text look like as it is glowing. The effect I use is outer glow for the text and feather for the colum.

11. Then, I paste my symbol from assigment 1 at the bottom-right of the poster. Below is the symbol together with its title.

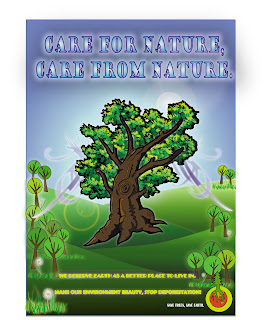
12. So the poster should looks like this at this stage. Looks simple but it actually needs a lot of works.

12. Finally, I make a overall "retouch" . The final product will be posted in the next post.
No comments:
Post a Comment